After about three years of use the Shuttle I use at work was starting to fail. First I noticed that the Audio would become scratchy, clicky and noisy then the machine would freeze or reboot.
I found 3 swollen 1800uF 6.3V electrolytic capacitors on the Motherboard.
These I replaced with 1800uF 10V capacitors from Farnell or CPC (same company) and this seemed to fix some of the problems. I encountered reboot problems etc and loaded the Xsensors program and this showed the 5V supply was varying wildly. I replaced the PSU and this fixed all the problems yeehaa.
Wednesday, 2 November 2011

Vboxmanage Command
The Vboxmanage Command
I had difficulty trying to increase the size of a virtual hard drive on one of my Virtual machines, but it turned out that the command below was all that was needed to turn a 15GB HD into a 20GB HD easy :).
vboxmanage modifyhd ~/.VirtualBox/VDI/Windows\ XP.vdi --resize 20000
Footnote: I forgot to use a partitioning program to resize the partition and use the whole disk. I booted a Gparted Live CD in the VM and used it to grow the partition to its full size.
I had difficulty trying to increase the size of a virtual hard drive on one of my Virtual machines, but it turned out that the command below was all that was needed to turn a 15GB HD into a 20GB HD easy :).
vboxmanage modifyhd ~/.VirtualBox/VDI/Windows\ XP.vdi --resize 20000
Footnote: I forgot to use a partitioning program to resize the partition and use the whole disk. I booted a Gparted Live CD in the VM and used it to grow the partition to its full size.
Monday, 22 August 2011
PPC iMac Network Fault
A PPC iMac was brought in and it was found that dhcp was not working (it wasn't receiving an IP address from the server).
It did work if the IP address was set manually. On further investigation it was found from the system logs that all dhcp requests were being denied. So the firewall was modified to allow dhcp requests and this fixed the problem.
It did work if the IP address was set manually. On further investigation it was found from the system logs that all dhcp requests were being denied. So the firewall was modified to allow dhcp requests and this fixed the problem.
Setup Gamepad in Ubuntu

The USB Gamepad was plugged in and the command dmesg
shows the following.
[74836.932026] usb 5-1: new low speed USB device number 3 using uhci_hcd
[74837.348311] input: GreenAsia Inc. USB Joystick as /devices/pci0000:00/0000:00:1d.3/usb5/5-1/5-1:1.0/input/input7
[74837.348529] pantherlord 0003:0E8F:0003.0004: input,hidraw3: USB HID v1.10 Joystick [GreenAsia Inc. USB Joystick ] on usb-0000:00:1d.3-1/input0
[74837.348540] pantherlord 0003:0E8F:0003.0004: Force feedback for PantherLord/GreenAsia devices by Anssi Hannula
[335187.792075] usb 5-1: USB disconnect, device number 3
[335190.016042] usb 5-1: new low speed USB device number 4 using uhci_hcd
[335190.219466] input: GreenAsia Inc. USB Joystick as /devices/pci0000:00/0000:00:1d.3/usb5/5-1/5-1:1.0/input/input8
[335190.219646] pantherlord 0003:0E8F:0003.0005: input,hidraw3: USB HID v1.10 Joystick [GreenAsia Inc. USB Joystick ] on usb-0000:00:1d.3-1/input0
[335190.219657] pantherlord 0003:0E8F:0003.0005: Force feedback for PantherLord/GreenAsia devices by Anssi Hannula
The USB Devices were listed using lsusb giving the output
Bus 005 Device 004: ID 0e8f:0003 GreenAsia Inc. MaxFire Blaze2
Bus 005 Device 002: ID 0a12:0001 Cambridge Silicon Radio, Ltd Bluetooth Dongle (HCI mode)
Bus 005 Device 001: ID 1d6b:0001 Linux Foundation 1.1 root hub
Bus 004 Device 003: ID 045e:009d Microsoft Corp. Wireless Optical Desktop 3.0
Bus 004 Device 002: ID 045e:0023 Microsoft Corp. Trackball Optical
Bus 004 Device 001: ID 1d6b:0001 Linux Foundation 1.1 root hub
Bus 003 Device 001: ID 1d6b:0001 Linux Foundation 1.1 root hub
Bus 002 Device 002: ID 046d:0840 Logitech, Inc. QuickCam Express
Bus 002 Device 001: ID 1d6b:0001 Linux Foundation 1.1 root hub
Bus 001 Device 004: ID 0bda:0161 Realtek Semiconductor Corp. Mass Storage Device
Bus 001 Device 002: ID 4971:ce17 SimpleTech 1TB SimpleDrive II USB External Hard Drive
Bus 001 Device 001: ID 1d6b:0002 Linux Foundation 2.0 root hub
A soft-link has to set using sudo ln -s /dev/input/js1 /dev/js1
The gamepad is calibrated using sudo jscal -c /dev/js1
It is now ready for use.
Thursday, 11 August 2011
Using Rsync
Some quick rsync examples
rsync -av /memstick/ /mymaindisk/
This will rsync the memstick directory to mymaindisk directory preserving all aspects of the files with the archive switch and the verbose switch will show whats happening.
rsync -avz /memdisk/ me@myserver:/backupdir/
This will do rsync over ssh rather than scp, using -a archive switch -z switch this signifies use compression over the link.
rsync -av /memstick/ /mymaindisk/
This will rsync the memstick directory to mymaindisk directory preserving all aspects of the files with the archive switch and the verbose switch will show whats happening.
rsync -avz /memdisk/ me@myserver:/backupdir/
This will do rsync over ssh rather than scp, using -a archive switch -z switch this signifies use compression over the link.
Tuesday, 9 August 2011
Ubuntu Server Screen Blank
Problem when rebooting Ubuntu 11.04 Server X86 after fresh install.
It caused the screen to be blank and a monitor message of overrange settings. This was traced to the setting of gfxmode=auto in the /boot/grub/grub.cfg file.
Note: you have to boot Ubuntu into rescue mode using the media CD/DVD/Memory Stick you used to install the system with.
From the command prompt make the /boot/grub/grub.cfg writable using chmod +w /boot/grub/grub.cfg command.
Now edit the file using vim /boot/grub/grub.cfg command.
The settings that worked for me were as follows gfxmode=1024x768 and with an entry gfxplayload=keep added directly after the gfxmode line.
After editing hit esc key then type wq and then hit enter this will write the file and quit vim.
Now reboot your system and hope it works.
What a mucking around to fix this stupid fault.
Information Source I used
It caused the screen to be blank and a monitor message of overrange settings. This was traced to the setting of gfxmode=auto in the /boot/grub/grub.cfg file.
Note: you have to boot Ubuntu into rescue mode using the media CD/DVD/Memory Stick you used to install the system with.
From the command prompt make the /boot/grub/grub.cfg writable using chmod +w /boot/grub/grub.cfg command.
Now edit the file using vim /boot/grub/grub.cfg command.
The settings that worked for me were as follows gfxmode=1024x768 and with an entry gfxplayload=keep added directly after the gfxmode line.
After editing hit esc key then type wq and then hit enter this will write the file and quit vim.
Now reboot your system and hope it works.
What a mucking around to fix this stupid fault.
Information Source I used
Tuesday, 5 July 2011
Add sudo to CentOS
Install the sudo package
# yum install sudo
Edit the sudo file by removing the # from the # %wheel ALL=(ALL) ALL to uncomment it.
# visudo
Save the changes and quit.
:wq
gpasswd -a username wheel
Change to sudo su.
sudo su -
Confirm that you can login with your username, then disable the root login.
passwd -l root
# yum install sudo
Edit the sudo file by removing the # from the # %wheel ALL=(ALL) ALL to uncomment it.
# visudo
Save the changes and quit.
:wq
gpasswd -a username wheel
Change to sudo su.
sudo su -
Confirm that you can login with your username, then disable the root login.
passwd -l root
Subscribe to:
Posts (Atom)
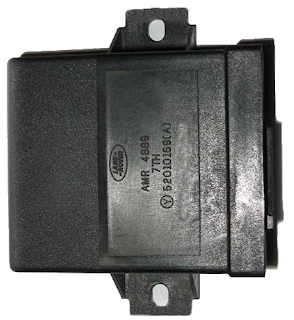
Defender 300tdi Lucas 10AS Alarm Immobiliser (Spider) Problems
We have a 1997 Landrover Defender 300tdi that has given immobiliser problems intermittently. I had initially fixed the fuel solenoid as we w...
-
 Server failure This server failed with the error "E171F PCIE Fatal Err B0 D3 F0" during power up. Upon inspection it was found th...
 -
 I make no guarantees for the information contained herein, I also cannot be held responsible for data loss as a result of your actions, we m...
 -
 I bricked my MR3220 router with an OpenWRT firmware upload. I did manage to get it back by soldering a 4 pin header on its pcb to allow conn...