Warning: while soldering be careful of solder fumes, wear eye protection and don't burn yourself. Note that charging batteries can be dangerous especially Li-Ion but the work detailed here means we are effectively generating our own internal 5V supply in the phone and connecting this directly to the USB power connections as they come into the phone. It is the equivalent of connecting a micro USB cable to the phone from a 5V USB charger, only its wireless. You have been warned and I am not responsible for your actions.
 |
| S7189 Display |
This S7189 quad-core Android phone from Star was pretty cheap around £100 and it worked well. I found the front facing camera was not the best, but for the price I can live with it. Screen was also pretty good with a reasonable viewing angle. It was also pretty slick running any Apps I downloaded from Play with no signs of lagging.
 |
| Palm Internal Charging Circuit |
I wanted to add wireless charging to the S7189 so I didn't have to keep plugging the charger into the micro USB connector. I noticed on HackaDay that some people had added wireless charging to their mobile phone , this is what I wanted. So I ordered a wireless Palm case back from Ebay for £3.
 |
| Palm Back Cover |
I then using scissors cut out out the area of plastic bounded by the Plastic label with Palm on it. This was to allow one to be able to peel off the label more easily from inside the case. I then stuck the label on some plastic film (after removing the circuit board, coil and metal discs) to preserve its stickiness.
 |
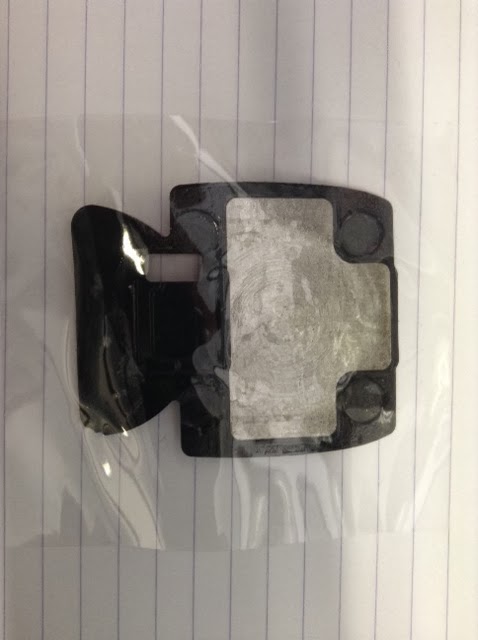
| Circuit Cut Out of Plastic Cover |
The coil and circuit board were removed from the old Palm cover by soaking in a plastic tub of Methylated Spirits for a few hours to soften the double-side sticky tape holding circuit and coil onto the plastic cover.
 |
| Sticky Cover Preserved |
 |
| Stuck to Clear Film |
 |
| S7189 Back with Cover Removed |
The S7189 internal back cover is removed (quite a few small black screws) exposing the Circuit board. I plugged in a Micro-USB adapter to find out where the center conductor was connected to on the Power PCB at the lower part of the phone using a multimeter set to continuity tone check. Ground was the metal tabs of the Micro-USB connector. I used Kapton tape to insulate the sticky copper foil I was using to route out power to the top of the back cover.
 |
| Ground Connection |
I then soldered flexible tinned insulated wire between the two Copper tabs next to battery, taking care not to overheat the plastic.
 |
| Routed Copper Tape |
 |
| Palm Charge Circuit Added to S7189 Back Case |
The removed Palm charge circuit was stuck to the middle of the S7189 back cover using its original sticky cover. Of the two small square gold connectors to the left of the Kapton tape the Lower one is the +5V the upper one is 0V or Ground.
To be sure check the output yourself with a multi-meter to ensure you have the correct polarity before connecting it to your valuable phone.
 |
| Phone Placed on Charger |
|
|
 |
| Phone Now Charging |
The S7189 is now able to be charged either by using the Micro-USB or wirelessly via the Palm Touchstone charger.
Note: don't use both at the same time or there could be overcharging problems with subsequent overheating and fire from the battery and circuit boards.